Let’s create a timer app!
I think this will be my first application that actually remotely resembles something usable. 🙂
Here are some of the topics introduced in this post:
• PageStackWindowStyle
• Inverted theme
• QTimer
• TimePickerDialog from com.nokia.extras library
• UiConstants
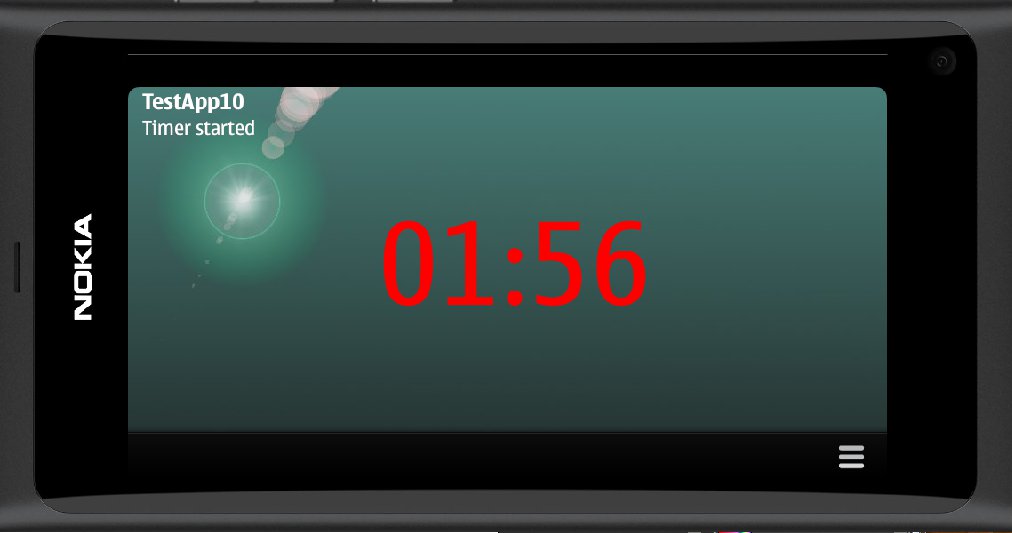
So the idea here is to create a timer application that simply counts down seconds from a given initial value (minutes/seconds). Looking like this:
I want to run the timer in the C++ backend so the QTimer class suits well for that purpose. There is also a QML timer element but I think the QTimer will be more flexible (and propably debugging will be easier, too).
Here is an excerpt from the QTimer help page:
The QTimer class provides repetitive and single-shot timers.
The QTimer class provides a high-level programming interface for timers. To use it, create a QTimer, connect its timeout() signal to the appropriate slots, and callstart(). From then on it will emit the timeout() signal at constant intervals.
Example for a one second (1000 millisecond) timer (from the Analog Clock example):
     QTimer *timer = new QTimer(this);
     connect(timer, SIGNAL(timeout()), this, SLOT(update()));
     timer->start(1000);
From then on, the update() slot is called every second.
Let’s create a MyTimer class (mytimer.h) and instantiate the QTimer class there. The two signals (valueChanged and timerMessage) will be used to pass the timer value and a status message to the QML user interface. A set of slots are also defined. The QML elements can call these slots when MyTimer is added to the root context.
#ifndef MYTIMER_H
#define MYTIMER_H

#include <QObject>
#include <QTimer>
#include <QString>

class MyTimer : public QObject
{
    Q_OBJECT
public:
    MyTimer();

signals:
    void valueChanged(QString minAndSec);
    void timerMessage(QString myMessage);

public slots:
    void set(int min,int sec);
    void start();
    void stop();
    void reset();
    void decrement();

private:
    int min, sec;
    QTimer *timer;
    static const int ONE_SECOND = 1000;
};

#endif // MYTIMER_H
The MyTimer implementation (mytimer.cpp) is shown below. The constructor (MyTimer()) will instantiate QTimer and connect it to MyTimer.
The set method will set the timer to the given minutes (m) and seconds (s) value, format a display string (e.g. “01:00” for one minute) and emit the valueChanged signal (if the value was changed).
The start(), stop(), reset() and decrement() methods can be used to control the timer. The decrement slot is connected to the timeout() signal of the QTimer object so that the timer value will be decremented whenever the QTimer object emits the timeout signal.
#include "mytimer.h"

MyTimer::MyTimer()
{
    min = -1;
    sec = -1;
    timer = new QTimer(this);
    connect(timer, SIGNAL(timeout()), this, SLOT(decrement()));
}

void MyTimer::set(int m, int s)
{
    QString timeStr;
    if ((m==min) && (s==sec))
        return;

    min = m;
    sec = s;
    timeStr.sprintf("%02d:%02d",min,sec);
    emit valueChanged(timeStr);
}

void MyTimer::start()
{
    timer->start(ONE_SECOND);
    emit timerMessage("Timer started");
}

void MyTimer::stop()
{
    timer->stop();
    emit timerMessage("Timer stopped");
}

void MyTimer::reset()
{
    stop();
    set(0,0);
}

void MyTimer::decrement()
{
    int m=min;
    int s=sec;

    if (m==0&&s==0) {
        stop();
        return;
    }

    s--;

    if (m==0&&s==0) {
        stop();
    } else if (s==-1){
        m--;
        s=59;
    }

    set(m,s);

}
The main function just instantiates the MyTimer class and inserts it to the root context (as mytimer). It will also initialize the timer to (0,0) so that the timer display will be updated.
#include <QtGui/QApplication>
#include <QtDeclarative/QDeclarativeContext>
#include "qmlapplicationviewer.h"
#include "mytimer.h"

Q_DECL_EXPORT int main(int argc, char *argv[])
{
    QScopedPointer<QApplication> app(createApplication(argc, argv));
    MyTimer *mytimer;

    QmlApplicationViewer viewer;

    mytimer = new MyTimer;
    viewer.rootContext()->setContextProperty("mytimer",mytimer);

    viewer.setOrientation(QmlApplicationViewer::ScreenOrientationAuto);
    viewer.setMainQmlFile(QLatin1String("qml/TestApp10/main.qml"));
    viewer.showExpanded();

    mytimer->set(0,0);  //display the value
    return app->exec();
}
Let’s next look at the QML code. In the main.qml file the background images (from the previous post) are taken into use. This can be done quite easily using the platformStyle property and the PageStackWindowStyle element (the image files were just copied to the qml/TestApp10 folder and then added to the project). Note also that the UI theme is changed (to inverted i.e. to a dark theme) at the end in the Component.onCompleted section.
import QtQuick 1.1
import com.nokia.meego 1.0

PageStackWindow {
    id: appWindow

    platformStyle: defaultStyle;

    PageStackWindowStyle {
        id: defaultStyle;
        background: "portraitBg.jpg"
        landscapeBackground: "landscapeBg.jpg"
    }

    initialPage: mainPage

    MainPage {
        id: mainPage
     }

    Component.onCompleted: {
        // Use the dark theme.
        theme.inverted = true;
    }
}
The rest of the user interface is defined in the MainPage.qml file. At the top there are two labels (myTitle and timerStatus) to display the app title and a status message. The next label (timerDisplay) will display the actual timer value. It is connected to the valueChanged signal of the MyTimer class. There is also a MouseArea that makes it possible to start the timer by just tapping the timer value.
Next there is the TimePickerDialog element from the com.nokia.extras library. It is used to enter the minutes and seconds to initialize the timer.
The last part defines the ToolBarLayout and the menu entries that can be used to control the timer.
Note that the com.nokia.meego library provides a UiConstants structure that contains some useful parameters for defining fonts and element placement within the page.
import QtQuick 1.1
import com.nokia.meego 1.0
import com.nokia.extras 1.1

Page {
    tools: commonTools
    anchors.leftMargin: UiConstants.DefaultMargin

    Label {
        id: myTitle
        color: "white"
        font: UiConstants.SmallTitleFont
        text : "TestApp10"
        anchors.top: parent.top
    }
    Label {
        id: timerStatus
        font: UiConstants.SubtitleFont
        anchors.top: myTitle.bottom
        Connections {
            target: mytimer
            onTimerMessage: {
                timerStatus.text = myMessage;
            }
        }
    }
    Label {
        id: timerDisplay
        color: "red"
        font.pixelSize: 128
        text : ""
        anchors.centerIn: parent
        Connections {
            target: mytimer
            onValueChanged: {
                timerDisplay.text = minAndSec
            }
        }
        MouseArea {
            anchors.fill:parent
            onClicked: {
                mytimer.start()
            }
        }
    }
    TimePickerDialog {
        id: tDialog
        titleText: "Set timer"
        fields: DateTime.Minutes | DateTime.Seconds
        acceptButtonText: "OK"
        rejectButtonText: "Cancel"
        onAccepted: {
            mytimer.set(tDialog.minute,tDialog.second)
        }
    }
    ToolBarLayout {
        id: commonTools
        visible: true
        ToolIcon {
            platformIconId: "toolbar-view-menu"
            anchors.right: (parent === undefined) ? undefined : parent.right
            onClicked: (myMenu.status === DialogStatus.Closed) ? myMenu.open() : myMenu.close()
        }
    }
    Menu {
        id: myMenu
        visualParent: pageStack
        MenuLayout {
            MenuItem {
                text: qsTr("Set timer")
                onClicked: tDialog.open()
            }
            MenuItem {
                text: qsTr("Start timer")
                onClicked: mytimer.start()
            }
            MenuItem {
                text: qsTr("Reset timer")
                onClicked: mytimer.reset()
            }
        }
    }

}
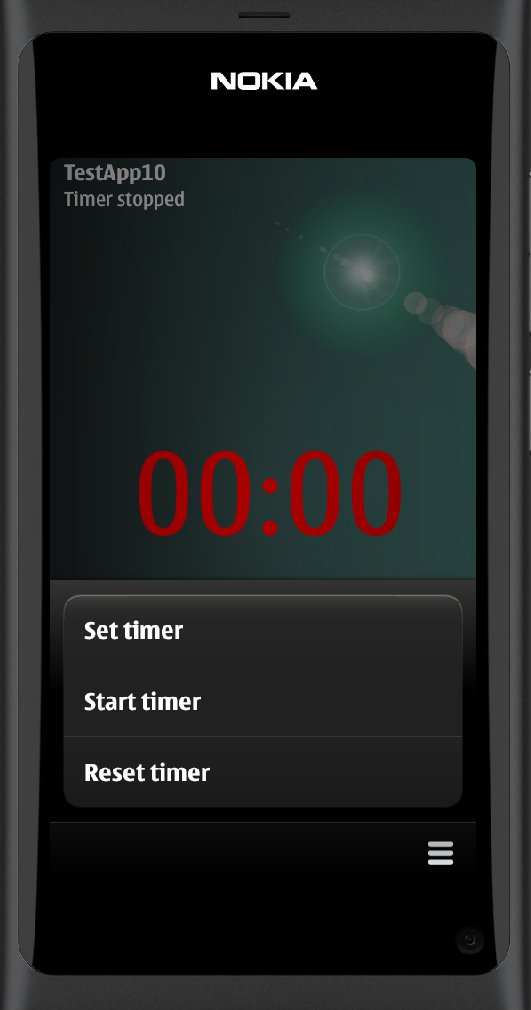
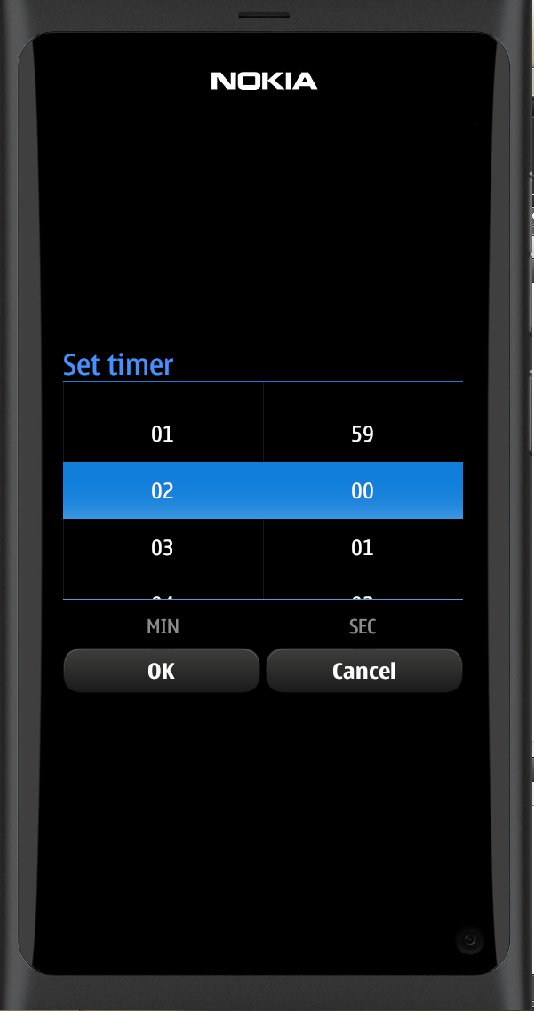
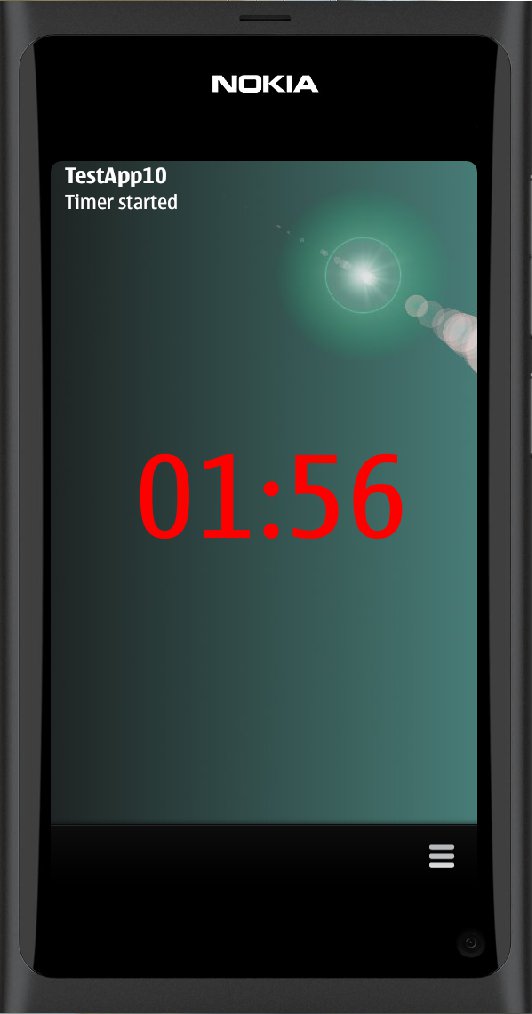
This is how the finished application looks like. The menu shows those three entries to control the timer (the timer can be started either from the menu or by tapping the timer display value). In the middle is the TimePickerDialog open. And on the right hand side the timer is shown running in the portrait mode.
The application source code can be downloaded from GitHub:
https://github.com/n9dyfi/TestApp10.git
One final comment. You might get red underlines in the editor when using the com.nokia.extras library like shown in the figure below.
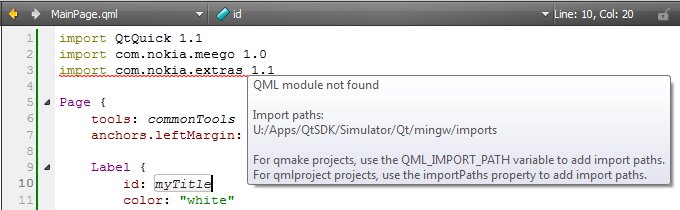
It seems that this is only an issue in the editor, the simulator still works ok. Anyway, this can be easily fixed by editing the <Project>.pro file and adding the library path to the QML_IMPORT_PATH variable, e.g. in my case I set the value as follows:
# Additional import path used to resolve QML modules in Creator's code model
QML_IMPORT_PATH = $$QMAKE_LIBDIR_QT/../imports/simulatorHarmattan