Creating a client/server app
This is my first experiment for running a simple client / server application in the N9. The objective is to create a QtCreator project which would produce two binaries: one acting as the client and the other as the server. The client would be a normal QtQuick application with a QML user interface. The server would be a console type of application without a GUI. In this first example the client and server won’t be communicating with each other, yet. I am just trying to create a kind of proof of concept how to build and install this kind of a combined binary application.
Creating the project
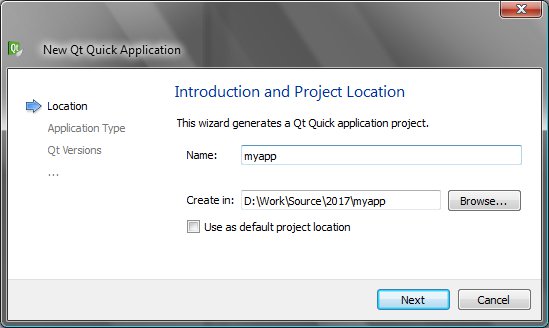
To start we need to create a new project in QtCreator. The type of project should be “Subdirs”. So from the Welcome screen just select: Create Project > Other Project > Subdirs Project.

I will name the project myapp.
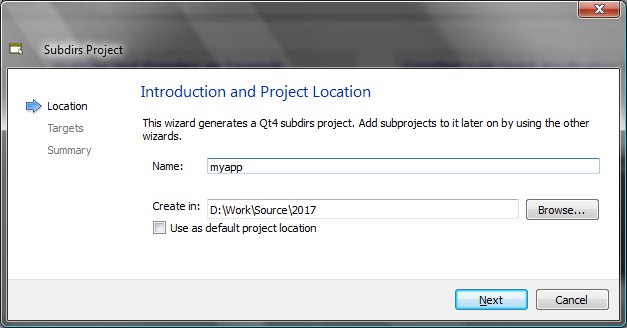
As I am going to run the app in the N9 device I will select the Harmattan target.

I will skip the version control part and just click Finish & Add Subproject.
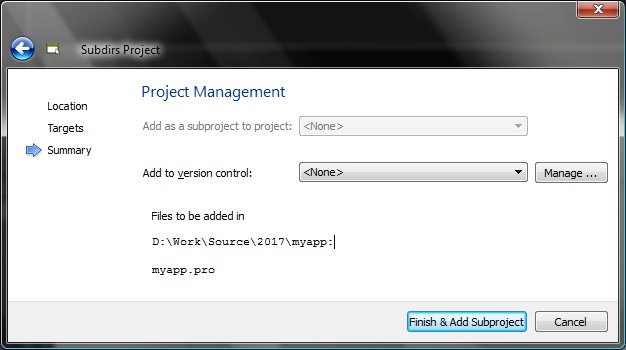
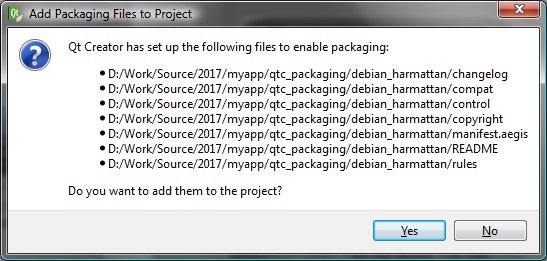
And just accept the packaging files.
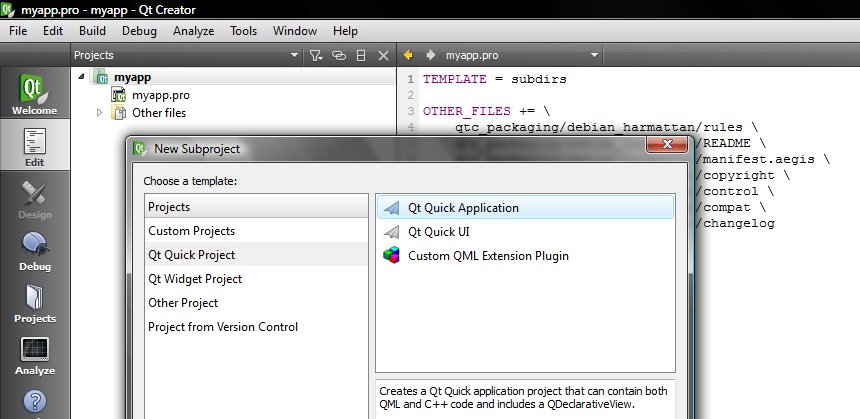
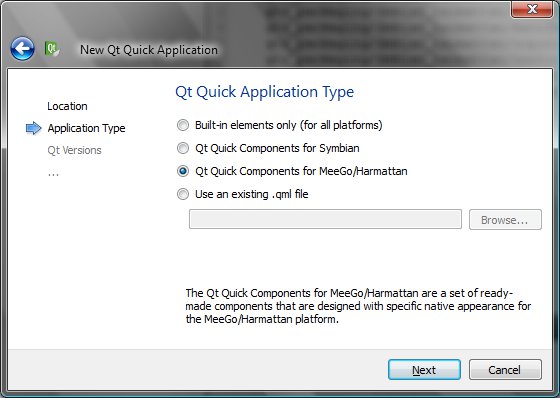
QtCreator will now prompt to select the type for the first subproject. Let’s select the typical GUI application type: Qt Quick Project > Qt Quick Application.
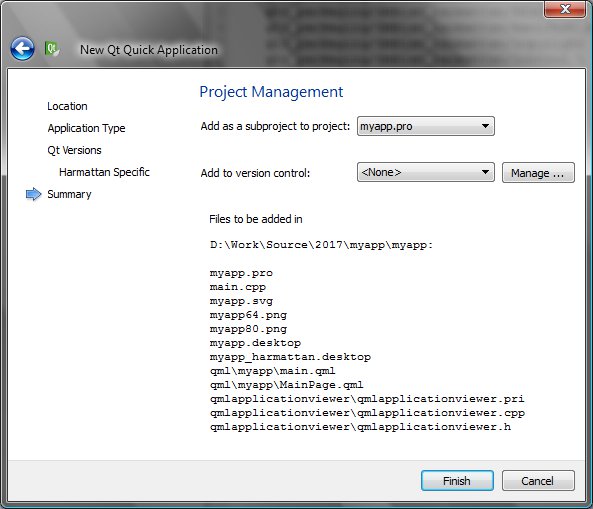
I’ll name the application “myapp” (the sub-project may use the same name as the main project).
For a typical QML application we should select the Qt Quick Components for Meego/Harmattan.
Let’s select again the Harmattan target and leave the version control empty. In the Project Management page we can accept the defaults and click Finish.
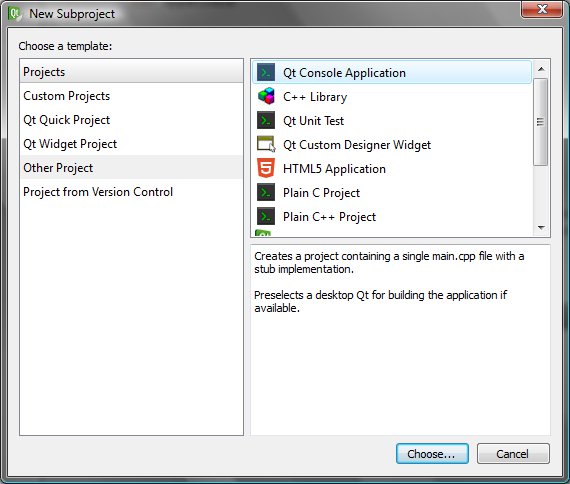
So now we have the client part template ready. The server part can be added in a similar manner. Just right click on the myapp (main project name) and select: New Subproject…

The server part should be created as a console application so let’s select Other Project > Qt Console Application.
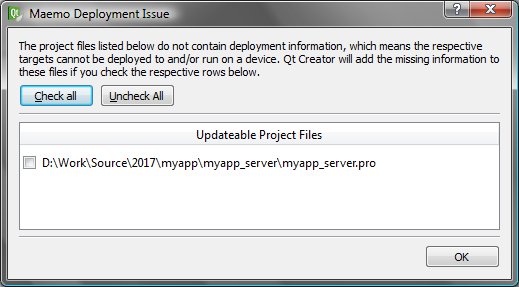
Set the subproject name to “myapp_server”. And as before set the target to Harmattan. After clicking Finish the QtCreator notifies about some missing deployment information in the server part. We can leave that unchecked (it will just add the default target path to the myapp_server.pro and we will change that anyway later on).
Now the basic project setup is done. Under the myapp project we have two subprojects: myapp and myapp_server. Both subprojects have their own project (.pro) files.

The client application
The template QtQuick application contains the familiar hello world program. At this stage we can leave it as it is and just check that it will install and run correctly in the N9 target.
The server application
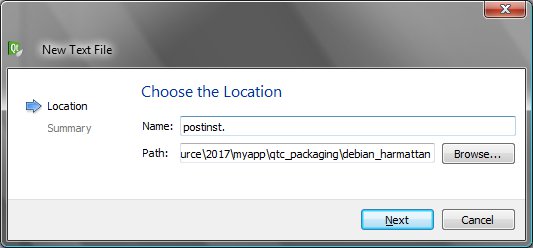
For the server application we need to do some additional steps to make it work correctly. First we need a way to start the server program when myapp is installed and stop the program when the application is uninstalled. These steps can be accomplished by adding two shell scripts to the qtc_packaging/debian_harmattan folder.
The first script is called “postinst”. You can add the file by highlighting the qtc_packaging folder and then selecting File>New File or Project… (General>Text File). Because the default extension for a text file is ‘.txt’ we need to add one dot after the file name to avoid adding the default extension to the file name.
Here is the postinst script.
#!/bin/sh
set -e

case "$1" in
configure)

echo "Starting server ..."
[[ -e /etc/init/apps/myapp_server.conf ]] && initctl start apps/myapp_server
;;

abort-upgrade|abort-remove|abort-deconfigure)
;;

*)
echo "postinst called with unknown argument \`$1'" &>2
exit 1
;;
esac

# dh_installdeb will replace this with shell code automatically
# generated by other debhelper scripts.

#DEBHELPER#

exit 0
The script will use the initctl command to start the server program. We also need to add an initctl configuration file for our server. The configuration file is called /etc/init/apps/myapp_server.conf. The configuration file will instruct the initctl program to start the server program when the phone is rebooted. We can put the configuration file myapp_server.conf to the myapp_server folder.
description "Server daemon startup script"
author "n9dyfi@gmail.com"
stop on core_shutdown
console output
respawn
respawn limit 3 300
normal exit 0
# This tries executing the daemon as 'user', but you also need
# aegis.manifest file for that to work.
exec /usr/bin/aegis-exec -s -u user /opt/myapp/bin/myapp_server
And we also need to update the myapp_server.pro file to tell QtCreator that we want to install this file to /etc/init/apps. We should also update the target path for the installer so that both the client and the server will be installed to the same target folder /opt/myapp/bin. Just add the new parameters as shown below.
serverconf.path = /etc/init/apps
serverconf.files = myapp_server.conf
INSTALLS += serverconf

target.path = /opt/myapp/bin
INSTALLS += target

OTHER_FILES += \
    server.conf
The second script is called “prerm” and it will be called when the application is uninstalled to stop the server.
#!/bin/sh

set -e

case "$1" in
purge|remove|upgrade)
initctl stop apps/myapp_server || true
# Just in case Upstart could not stop the daemon, kill it
killall myapp_server || true
;;

failed-upgrade|abort-install|abort-upgrade|disappear)
;;

*)
echo "postrm called with unknown argument \`$1'" &>2
exit 1
;;
esac

#DEBHELPER#

exit 0
For more information about the installation scripts you can check the debian packaging FAQ:
https://www.debian.org/doc/manuals/debian-faq/ch-pkg_basics.en.html
There is one additional file that we will need for the server. We need to define what credentials the server binary must have to access all the required device features. These credentials are defined in the file manifest.aegis located in the debian_harmattan folder. When a new project is created the file will contain a set of example credentials but they are all commented out. For the server binary I will just define the user and group that should be used to run the binary. Note that the user defined here should match with the user (-u) defined in the myapp_server.conf file.
<!-- Run the server binary using the standard user account -->
<aegis>
  <request>
    <credential name="UID::user" />
    <credential name="GID::users" />
    <for path="/opt/myapp/bin/myapp_server"/>
  </request>
</aegis>
Building the application
We should now have a working application, so let’s build the binaries. Clicking the build button (or pressing ctrl-B) should result in a succesfull build.
Running the application
I will connect my N9 using WLAN (using the sdk-connectivity tool). Let’s first check that we have a working connection by going to Tools>Options>Linux Devices and clicking the Test button.
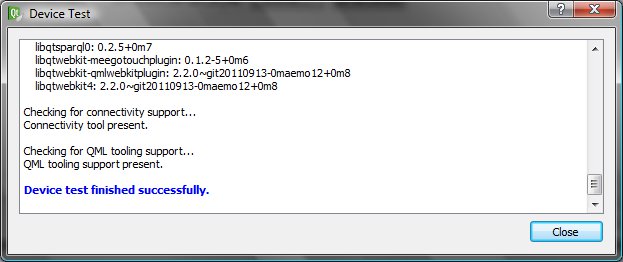
If that works then we can go to the Projects page, click the Run option in the Harmattan target and change the default device configuration (typically Meego Emulator) to our N9 WLAN configuration.
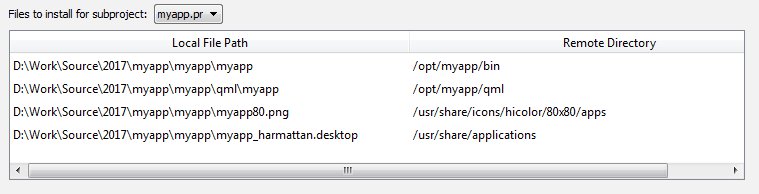
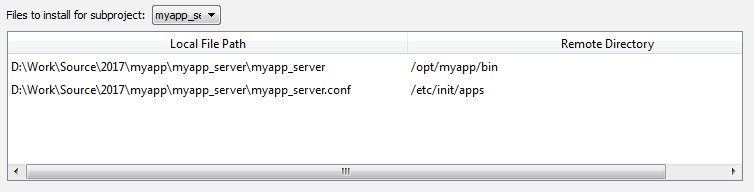
We can also check that all the files are going to the correct target folders:
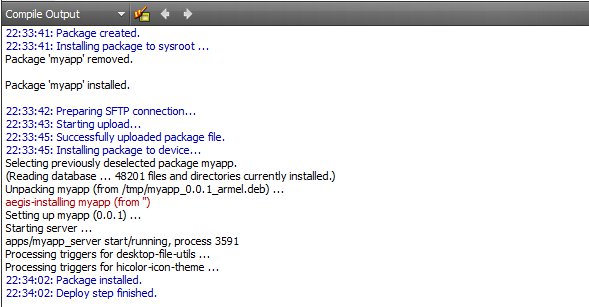
Let’s proceed by clicking the Run button (or ctrl-R). The Compile Output window should show that our files are installed and that the client and server applications are started.
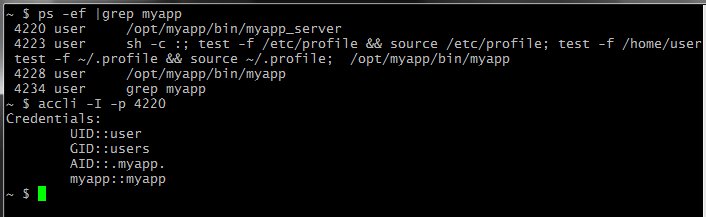
To check if the server has really started we can use the N9 terminal application or login to the N9 using ssh (e.g. using putty on windows). We can first check with the ‘ps’ command that both the server (myapp_server) and the client (myapp) are running. We can also check that the server has received the correct credentials from the manifest file by using the accli command.
Looks good!
I’ll upload the code to github so that the project can be opened directly from there, please see:
https://github.com/n9dyfi/TestApp13.git