Comprehensive firmware flashing
So far I have only used the N9 simulator to test my simple applications. Before trying to program the real N9 I think it would be a good idea to reset the device so that I can start from a clean desk.
Here I will just briefly describe the flashing process. For full details please take a look at
http://talk.maemo.org/showthread.php?t=82693
And before starting, just a reminder from the maemo page above:
Warning: Improperly using flasher could damage your phone and void your warranty.
Well, the flashing operation is actually quite simple, just be careful out there!
The needed steps are listed below and described in more detail further down the page.
- backup the phone (contacts, photos, videos, music, etc.)
- download the N9 firmware files
- download the flasher tool
- flash the phone
- restore the backup
Backup the phone
If you want to save your contacts and other information then start by making a backup. Nokia Suite or Nokia Link tool can be used for that.
Download the N9 firmware files
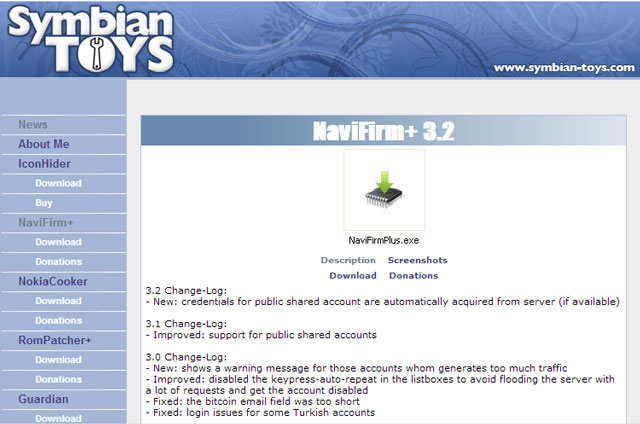
I used the NaviFirm+ tool to download the needed firmware files. The NaviFirm+ v3.2 can be downloaded from
http://www.symbian-toys.com/navifirm.aspx
If you want to flash the phone with the original country variant you will need to first find out the variant. The code is printed on the SIM card tray. My SIM tray looks like this:
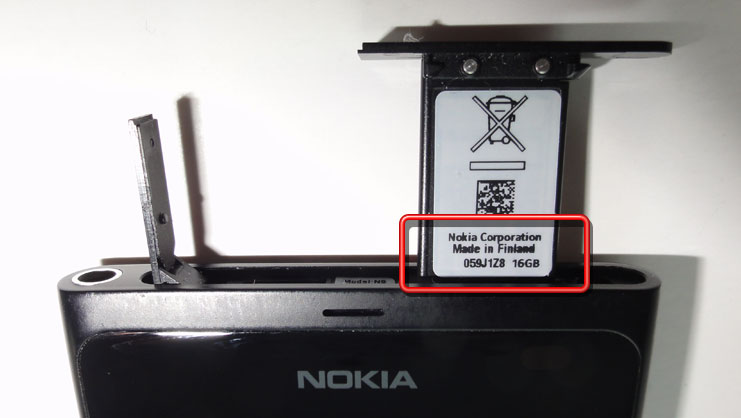
The variant code in my case is 059J1Z8. I can use the code to select the needed firmware files in the Navifirm+ tool.
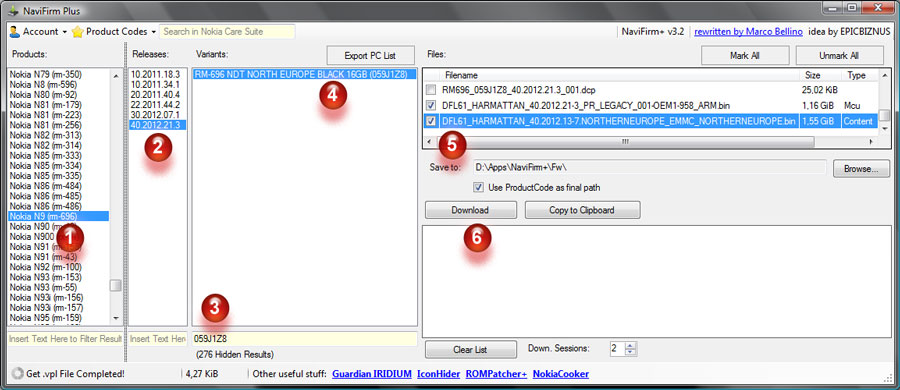
- Select the phone model: Nokia N9 (rm-696).
- Select the firmware version, latest = 40.2012.21.3.
- Use the filter to find the country variant.
- Select the variant.
- Two files are needed, tick the MCU and Content files.
- Click Download.
Download the flasher tool
For windows the flasher tool is WinFlasher_3.12.1.exe. It can be downloaded e.g. from mega.co.nz as part of the flasher.rar package, that contains the flasher tool for different operating systems:
https://mega.co.nz/#!hBYxBR6Q!L0DFEGTUCCFNqqsX-eIDcDAcvXMNcziJAfPitcNLrkA
I’ll install the flasher tool into the folder D:\Apps\Nokia\Flasher. I will also put the firmware files into the same folder so that the flasher can find them.
D:\Apps\Nokia\Flasher>dir /w
 Volume in drive D is Data
 Volume Serial Number is 92A5-FF20

Directory of D:\Apps\Nokia\Flasher

[.]
[..]
DFL61_HARMATTAN_40.2012.13-7.NORTHERNEUROPE_EMMC_NORTHERNEUROPE.bin
DFL61_HARMATTAN_40.2012.21-3_PR_LEGACY_001-OEM1-958_ARM.bin
flasher-man.txt
flasher.exe
[help]
[licenses]
README.txt
unins000.dat
unins000.exe
 7 File(s) 2 915 475 550 bytes
Flash the phone
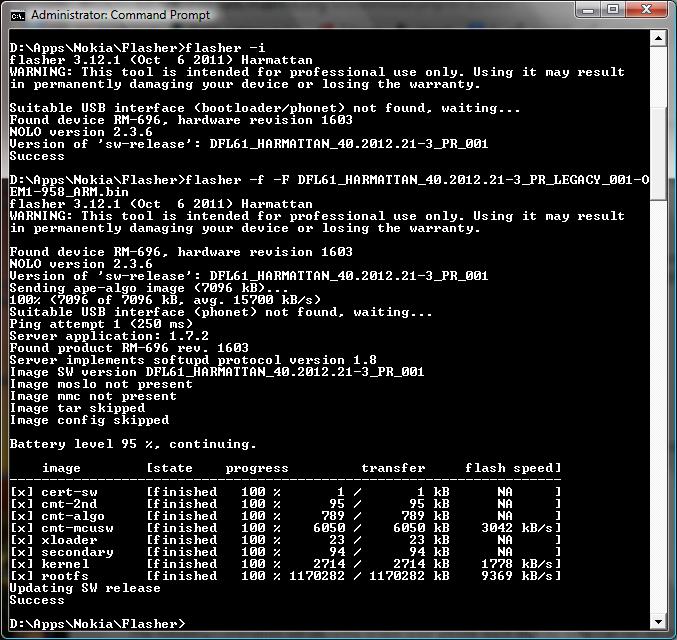
First make sure the phone battery is fully charged. Then disconnect all the cables from the phone and power off the phone. On the windows side start the command prompt with administrator rights (right click ‘cmd’ and select ‘Run as administrator’). Go to the Flasher folder. Run the command ‘flasher -i’ and then connect the phone (still switched off) with the USB cable. The flasher should display the current firmware version.
Now we’re ready to start the flashing. The first step is to replace the operating system using the MCU file. The command syntax is:
flasher -f -F <MCU file>
In my case the output from these two commands looks like the following:
As I want to do a full reset the next step is to replace all the user files with the original phone contents. For this step we will use the Content file. The command syntax is:
flasher -f -F <MCU file> -F <Content file> --flash-only=mmc
The final step is to reboot the phone with the command:
flasher -R
The output from these two commands is shown below:
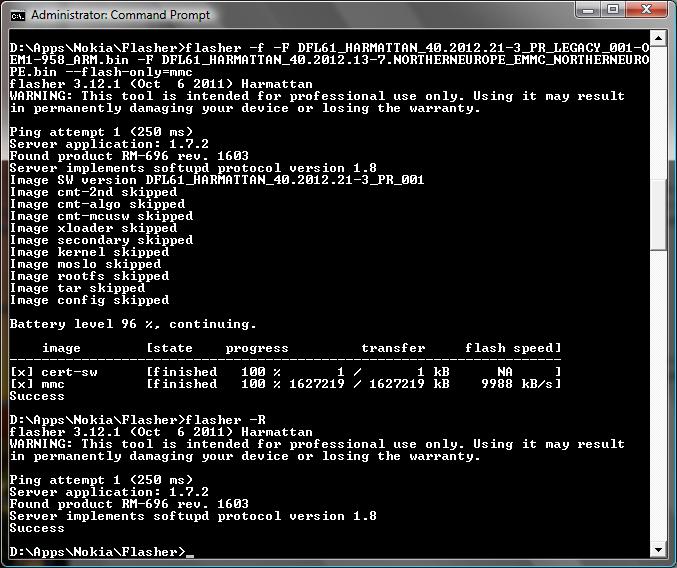
That’s it. The phone should now reboot.
Restore the backup
Restore the contacts, photos, music etc. from the backup.
Tools
Here is the flasher tool archive in case the link mentioned above stops working.