Share your project
Now that we have a working Git version control system in place it is very easy to start sharing the projects. For open-source projects the number one sharing site is probably GitHub. Creating repositories on GitHub does not cost anything, it is free as long as you keep your repository publicly accessible.
First let’s create an account on GitHub. Just go to github.com, enter a username, your email address and a password and click “Sign up for GitHub”. That’s it.
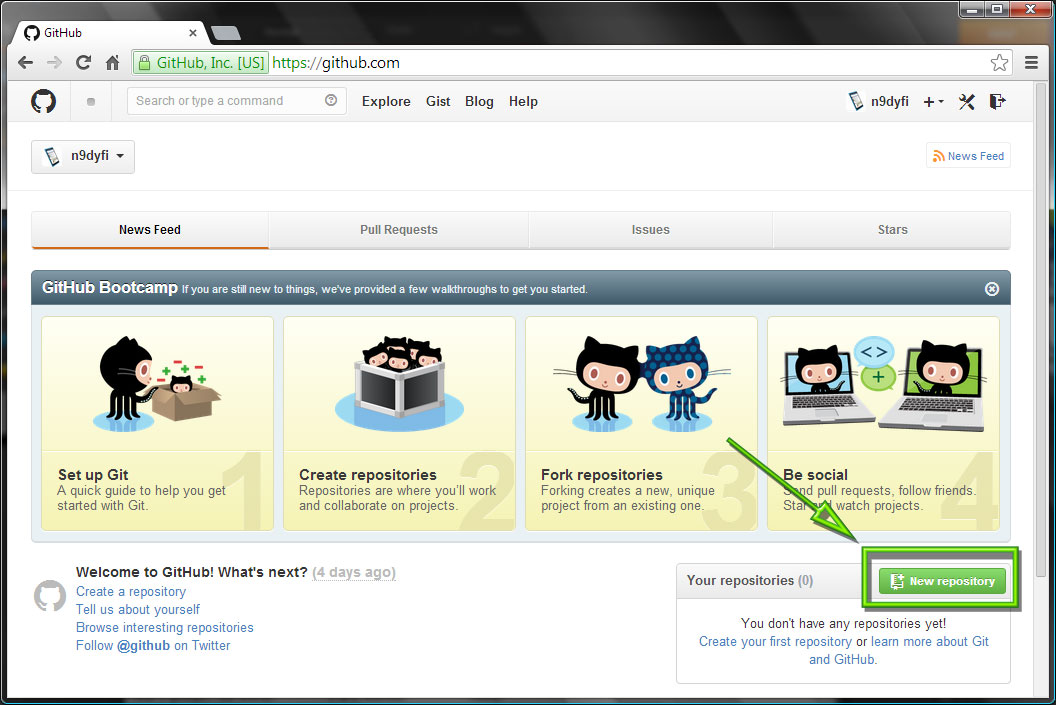
Next we need to create the repository. In your home page click the button “New repository”.
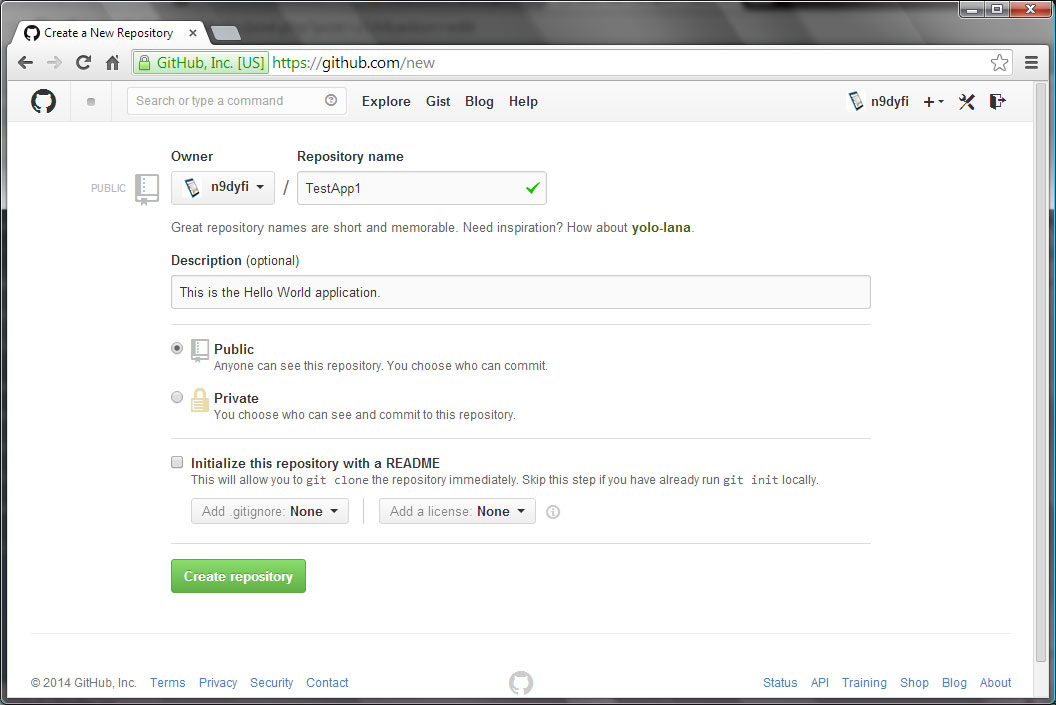
Next enter the repository name (this should match the QtCreator project name, e.g. TestApp1) and a short description and then click “Create repository”.
The repository is ready. The summary screen shows the repository address and also the required Git commands to link your existing repository to GitHub,
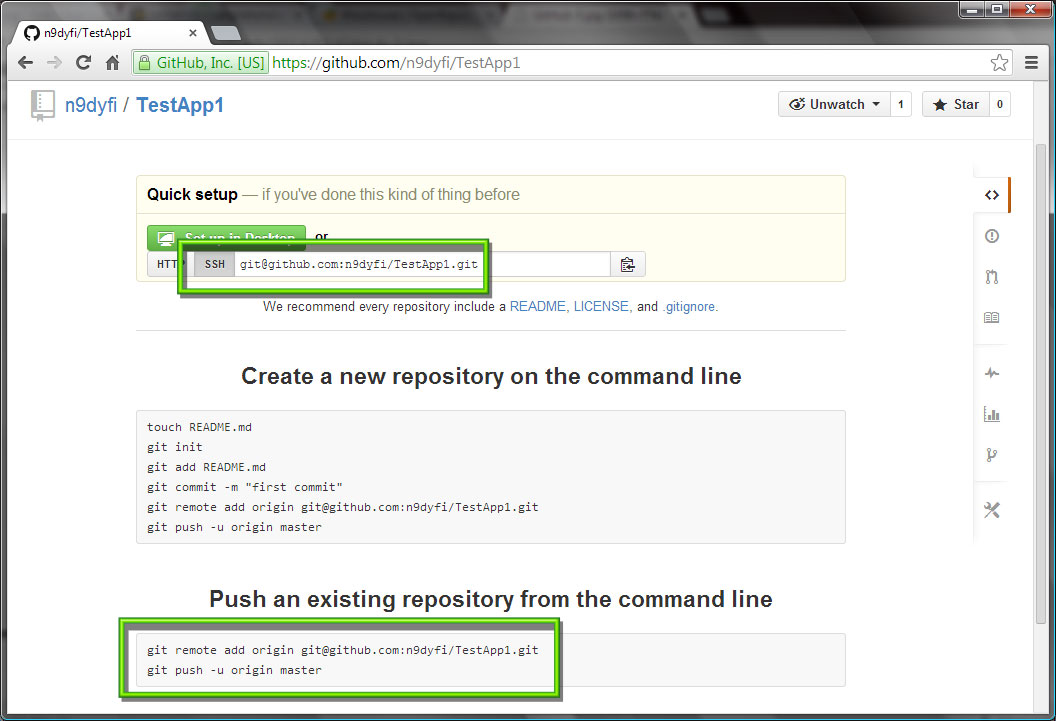
The GitHub repository can be accessed either via HTTPS or via SSH. I would recommend using SSH as that makes the usage simpler (e.g. no need to type the password when connecting and in addition the file transfers seem to be faster).
For SSH usage we need to create a private/public key pair. That we can accomplish directly from the Git Bash console by running the ssh-keygen command as shown below. As a result two SSH keys will be stored in files .ssh/id_rsa (the private key) and .ssh/id_rsa.pub (the public key).
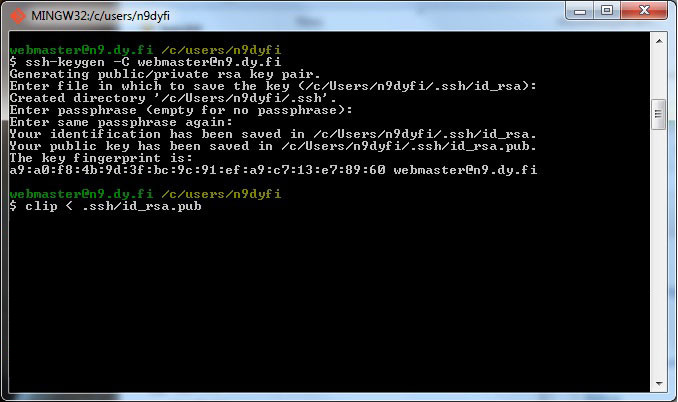
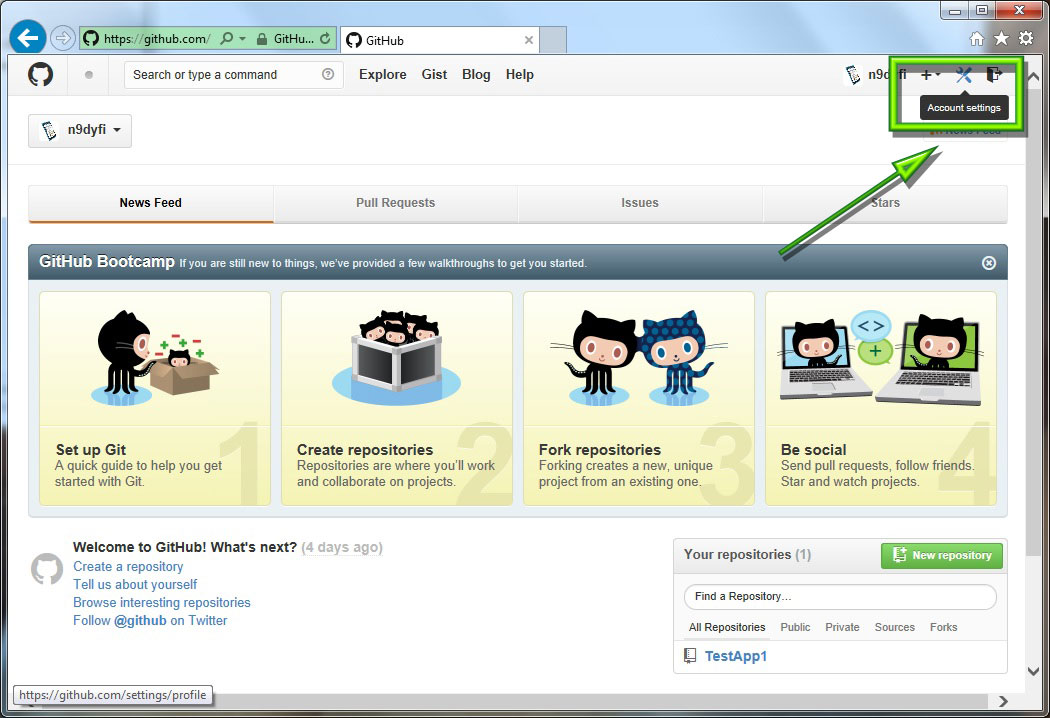
Note that I deliberately left the passphrase empty. This means that my private key is not protected which is not a good thing in general. However, I guess I can accept that as the keys will be used only for testing the GitHub access. The benefit is that I do not need to enter any passphrases when using the keys. Note also that I used the clip command to copy my public key to the clipboard. Next we need to store the public key to GitHub. Let’s go back to GitHub and select “Account settings” (click the tools icon in the top right hand corner).
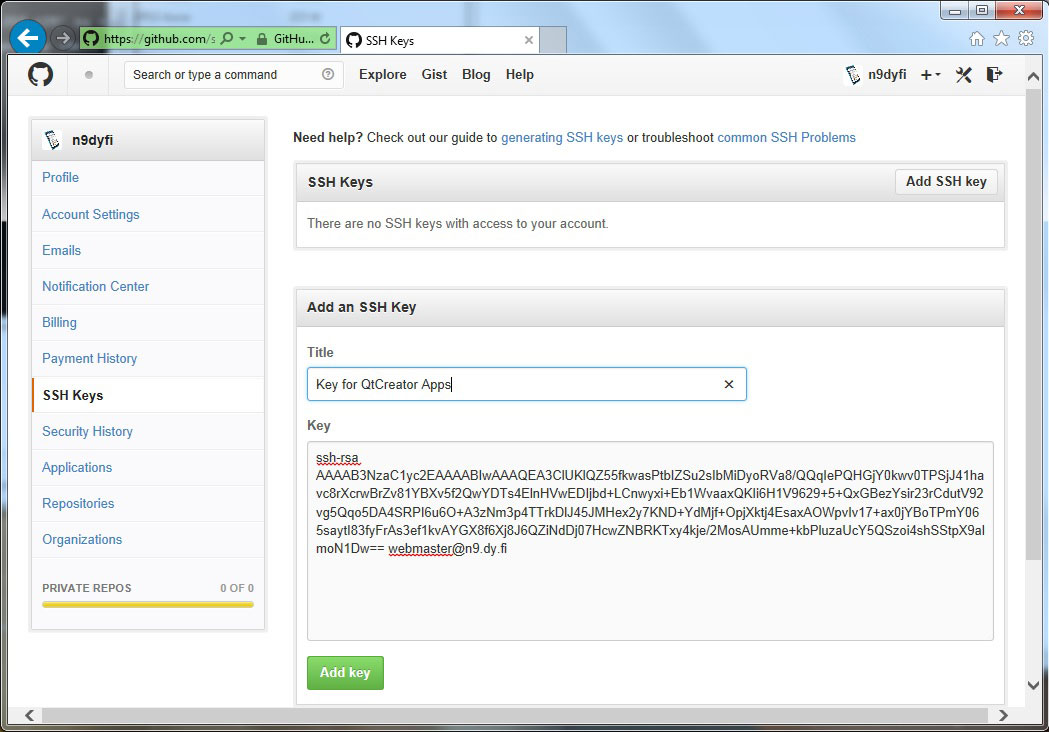
In the Account settings page select “SSH Keys” and then “Add SSH key”.

Paste your public key to the Key box and enter some description and then click “Add key”.
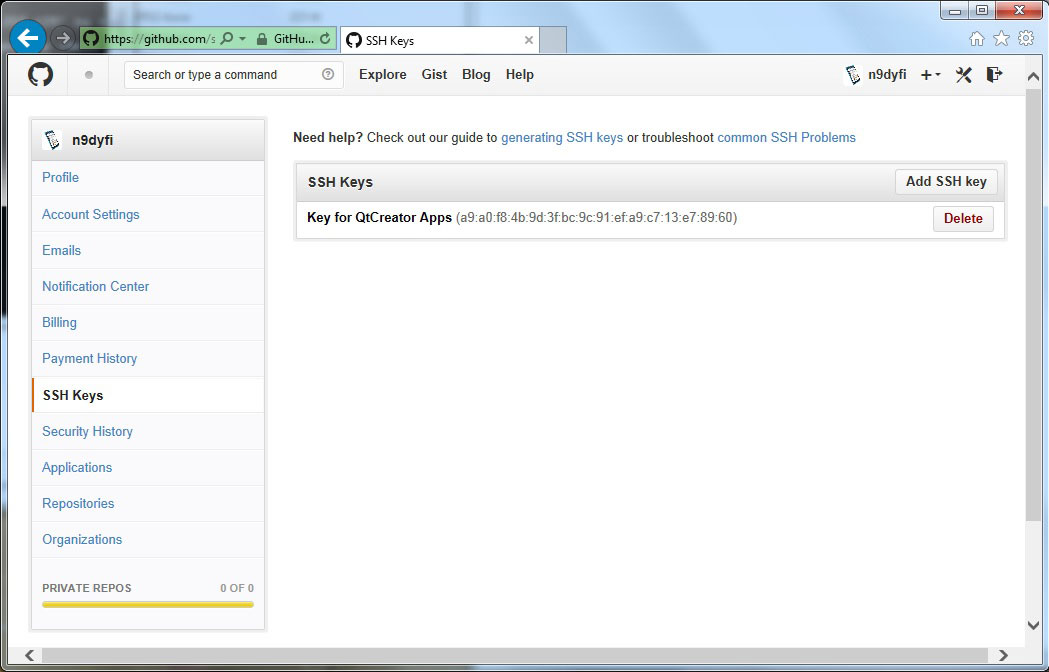
The newly added key will be shown in the “SSH Keys” list. The fingerprint should match with the fingerprint the ssh-keygen reported earlier.
Before proceeding we could first check that our keys work correctly with GitHub. Going back to our Git Bash console enter the command:
$ ssh -T git@github.com
You should see a greetings message from GitHub that confirms our SSH authentication works.

Ok, we’re almost done. The final step is to link our local repository to the GitHub repository and to push the local contents to the remote server. We will use the commands that GitHub told us to use when we created our repository:
$ git remote add origin git@github.com:n9dyfi/TestApp1.git
$ git push -u origin master
Of course these commands must be run from the TestApp1 project folder. The first command tells our local git repository that we have a remote repository named “origin” (this is a name you can select freely, a common Git convention seems to be to use “origin” here) and that the remote repository can be reached at address “git@github.com:n9dyfi/TestApp1.git”. The second command will push our local repository “master” branch to the “origin” repository and make the local master track the origin master.

As one final step we could start QtCreator and look at Tools>Git>gitk.
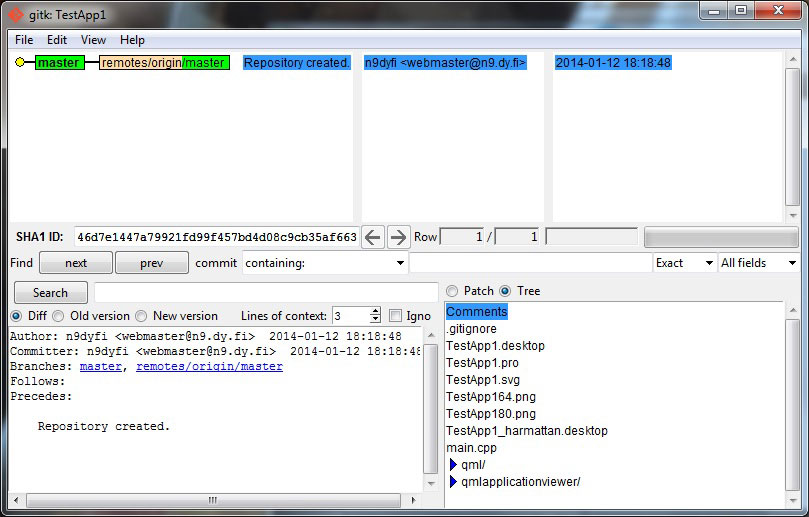
Looks fine. Our local master branch is linked to the master branch at the origin. Now after committing changes to our TestApp1 project we can run Tools>Git>Push to push the changes to the GitHub repository.